PolyMesh Modeling and Subdivision Overview Tutorial
no © 2000 - tutorial par Olivier Amrein
PART
II
select
the object and add the a Subdivided Poly Mesh
Create->Poly. Mesh-> Subdivision
divison up to
4 or more if you got a TourboMachine :-))
but there's no need as you can adjust it after completion of the modeling
process
move the newly created object a bit to the side

note:
be sure you are not working in Immed mode or you will not have
the "Modeling Relation"
note 2: there is also a method dealing with the Geometry Approximation.
select the
vertex in the low-poly model as shown :

scale them
in X 0.5

see the subdivided polymesh move in real time? thats the joy of 1.5 :o)
by moving the points around (the "I move-scale-rotate the points trick") you can easily make a cool Nessie-face:
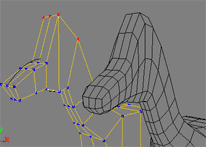
select the polygons
as shown in fig 423. (before) and make
a
Local Subdivision Refinement (Modify-> Poly.Mesh->Local
Subdivision Refinement)
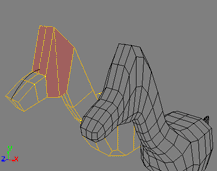
fig. 423. (before)
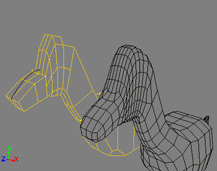
after
you can momently hide the Subdivided Mysterious Animal as we will now add the wings to the low poly model.
select these 2 edges:
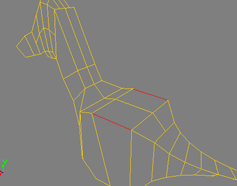
note: I have first moved a few vertices so i have a larger
wing
now do a Extrude
Along Axis with the following values:
length: 10
Subdiv : 4
you should have
this kind of weirdos wings:
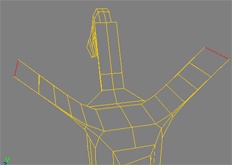
with the help of
the magic that only the creatives like you have,
do the "I move-scale-rotate the points tricks"
and get a result like this one:
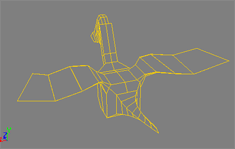
and if you unhide
the subdivided mesh you have
a very nice looking ....euh. ...euh ...flying...duck...dino...bird...
well a Poly.Mesh animal :o))
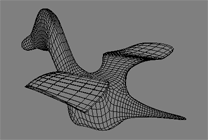
note i increased the subdivision to 2 for this image
well you know know the basics of polygon modeling....
with a little practice and tricks you can easily do in a few minutes a cool dragoon like this one (nothing to do with this tutorial):
before subdivision and after subdivision
thanks for having read this tutorial until the end...the nation is very proud of you.
no © 2000 - tutorial par Olivier Amrein