PolyMesh Modeling and Subdivision Overview Tutorial
version
beta 1.05 :-))
no © 2000 - tutorial par Olivier Amrein
PART I
Remarks:
This tutorial is intended for people having already some XSI notions
Be sure your in "model"
module (press 1)
I do often work in Hiddenline mode which suits me the best
Works with XSI
1.5 and
more only
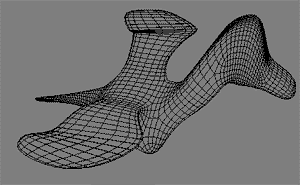
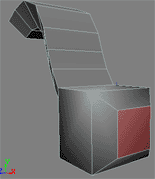
This is what we
are going to achieve (or try to):
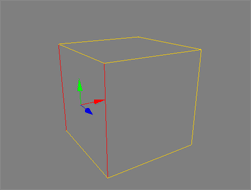
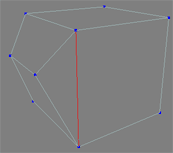
let's start with a marvellous 6-sided cube: Get->Primitive->Polygon Mesh->Cube
note: you can also write edge[7,10] in the selection field (it should work)
note : E-key is to switch in edges mode, Y-key in poly-mode (with rectangular selection), U-key is raycasting selection poly mode
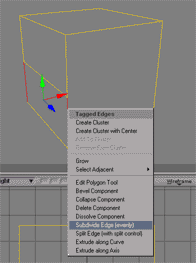
now we will subdivide the edge: there are 2 methods:
| - in the menu Modify-> Poly Mesh-> Subdivide Edges (Evenly) |
| - or pick point
in the selected edge and by holding ALT and right mouse button (RMB)... you get a very cool "Contextual Menu" ...where you find our Subdivide Edges (evenly) command |
select
the newly created edge and move it a bit in the front
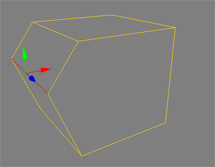
scale it in x to 0.6
we
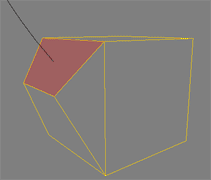
now have on each side a pentagon ... with non coplanar points... we are
going to add a new edge to correct this.
back in object mode (often the spacebar will do it) and select the onject
do the Contextual menu trick (a.k.a. Magik-menu) and select Add Edge
Tool
(or press \ (which doesnt work cause I have a swiss keyboard))
(or go in the menu Modify->Ploy.Mesh->Add Edge Tool)
select the 2 points and add the edge
do the other side too
hum...I'm pretty
lazy :o)
in
the right view draw a curve (Create->Curve-Draw CV NURBS)
a bit like this one :
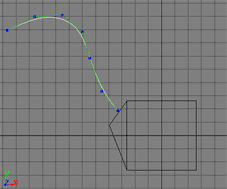
select
the front poly (using the raycast method U-key for instance)
and do an Extrude Along Curve ...
select the curve you just draw and set the SubDivs to 6
...you should get this figure:
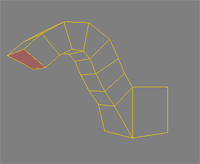
now to the tail ...
select the extreme back poly and do a Bevel Component (using the
Magik-menu) on it of around 0.4
note : dont forget to deselect previously selected component or you'll get weird results
with the back poly still selected do an Extrude Along Axis:
length 8
subdivs 6
in the tranform panel:
sclae x=0.1 y=1.6 z=0.1
rot x=40 y=60 z=30
fianlly turn the per subd off
do
you get something like fig8 ?
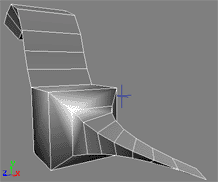
have you noticed Iswitched to shaded mode? heu!?!
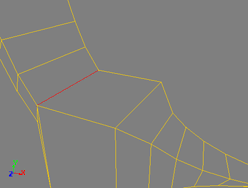
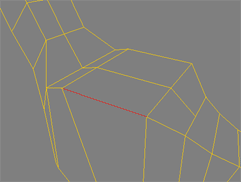
reselect the object and select the Split Edge Tools and
use the middle button (Split All Parallel Edges) on the edges shown
in those 2 fig.
this is a good way to add points
for further refinement, isn't it?
 -
- 
select the 2 lower front vertex and Bevel them (0.5)...

now
let's subdivide this a bit:
go
to part II
no © 2000 - tutorial par Olivier Amrein